
I'm not a professional photographer.. Just getting that fact out of the way!
Which also brings up the point, "If I can do this, ANYBODY can"!!!
I have by no means mastered photography,
but I believe each day my photos get just a little better.
I'm always working towards improving, trying my best, which is all I can do :)
However I am often inquired of for product photography tips.
So here is what works for me...
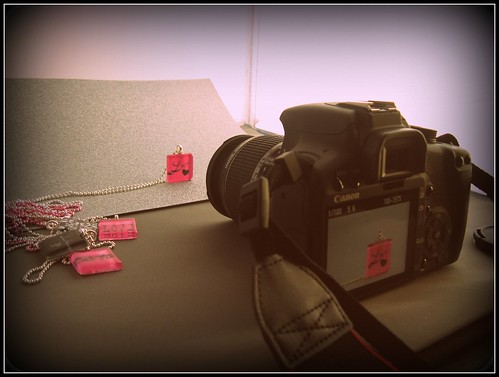
First off, you'll need a table top studio, or light box of some sorts.
You can easily make a light box using any DIY tutorial.
Like this one: How To: DIY $10 Macro Photo Studio.
Or you can purchase a table top studio, complete with lights and tripod.
Like this one: Deluxe Table Top Photo Studio.
This is what I have recently purchased after using a DIY light box for about a year. Both work equally great!
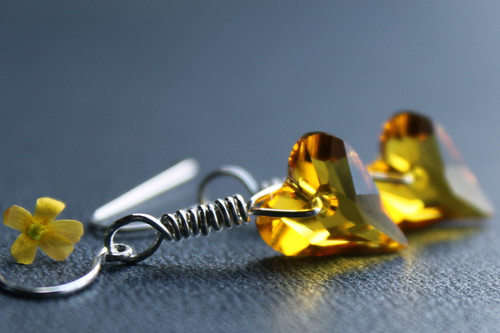
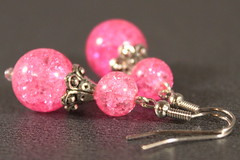
Next you will need a nice background. I really like using paper.. like scrap booking paper. It creates a nice smooth surface and the options of color, texture, designs are endless!! One of my Fav's is glitter paper!
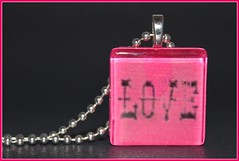
Here is an example using black textured paper:
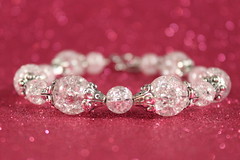
If you are looking for a nice clean white "disappearing" type background, white poster board is the best!
As seen here:

I tend to stay away from the use of props for my product photos. While they can look nice and artistic, to me they are a distraction from the product. I like to keep it clean and simple. :)
Next you'll need to set your camera settings for taking close up, macro, photos.
Your camera should have a macro (little flower) setting. Using that setting, along with NO FLASH will give you the best results.
Here's the fun part! Getting creative using different camera angles and trying out different product positions.
Lastly, some minor photo editing may be necessary. If you aren't familiar with photo editing, it's really easy. I used to do all mine in iphoto but have recently moved on to photoshop. There's also free software out there you can use, such as picasa, GIMP, and picnik. If you already have a Flickr account, you can edit in picnik right there!! I do that a lot as well ;)
Don't be afraid to try out all the settings, testing everything. Seeing what works, and what doesn't. That's how I figured out what works for me, and remember.. you can always revert back to original!!
Oh, and of course, Have Fun!!!
❤Amy
©2011 amysbodydecor
nice! thanks for the tips!
ReplyDeleteThanks for the great tips! I've been working on improving my photos as well. I use scrap booking paper for backgrounds for my smaller pieces as well, and fabric for my larger pieces.
ReplyDelete-Michelle of CreativeCritters
I have been contemplating purchasing a light box but he link to the DIY one has inspired me! I'm going to make one this evening and try it out. Nomore waiting for sunshiney days for me!
ReplyDeleteThank you SO much for this entry.
Nice post and photos! The scrapbook paper for backgrounds is a great idea. I've actually made a light box using the tutorial you cited and it works well. I just need to get better lighting!
ReplyDeleteGreat post! Thank you for the tips. Your photos are just spectacular! :)
ReplyDelete@Anne You're Welcome! Thanks again for sharing :)
ReplyDelete@Michelle Cool! You can get really big poster board for the larger pieces too, if you want something smoother than fabric.
@divapixie Awesome!! Good Luck! Can't wait to see your new photos :)
@Belle Journee I had trouble with the lighting when using my diy light box. I always just used the natural sunlight. My new studio came with lights.
@Cheryl Thanks so much! :)
Thanks for the tips!! Found you through the Handmade Wednesday Blog Hop and I'm following you now. :)
ReplyDeletewww.libertyoriginal.blogspot.com
Thanks Liberty!! Following you now as well :)
ReplyDelete